
Castles MP200
- Certification: See Certified Platforms List
- Supports Swipe
- Supports EMV
- Supports Contactless
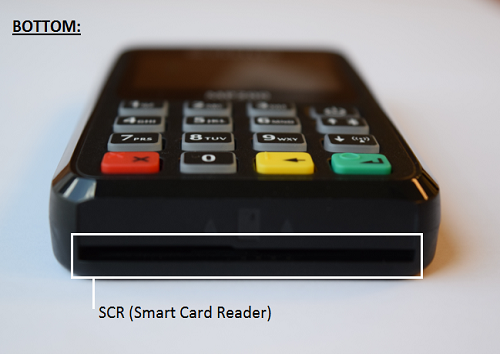
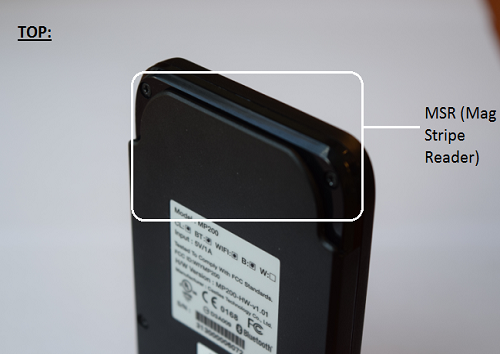
Anatomy of the MP200

Pairing Device (iOS)
The following steps must be followed to pair the MP200 with the iOS device. Note: If the Castles MP200 device is to be used with multiple phones/tablets then the MP200 device must be unpaired from any unused mobile devices.
- On the MP200 device press and hold the Bluetooth button until the device requests PIN
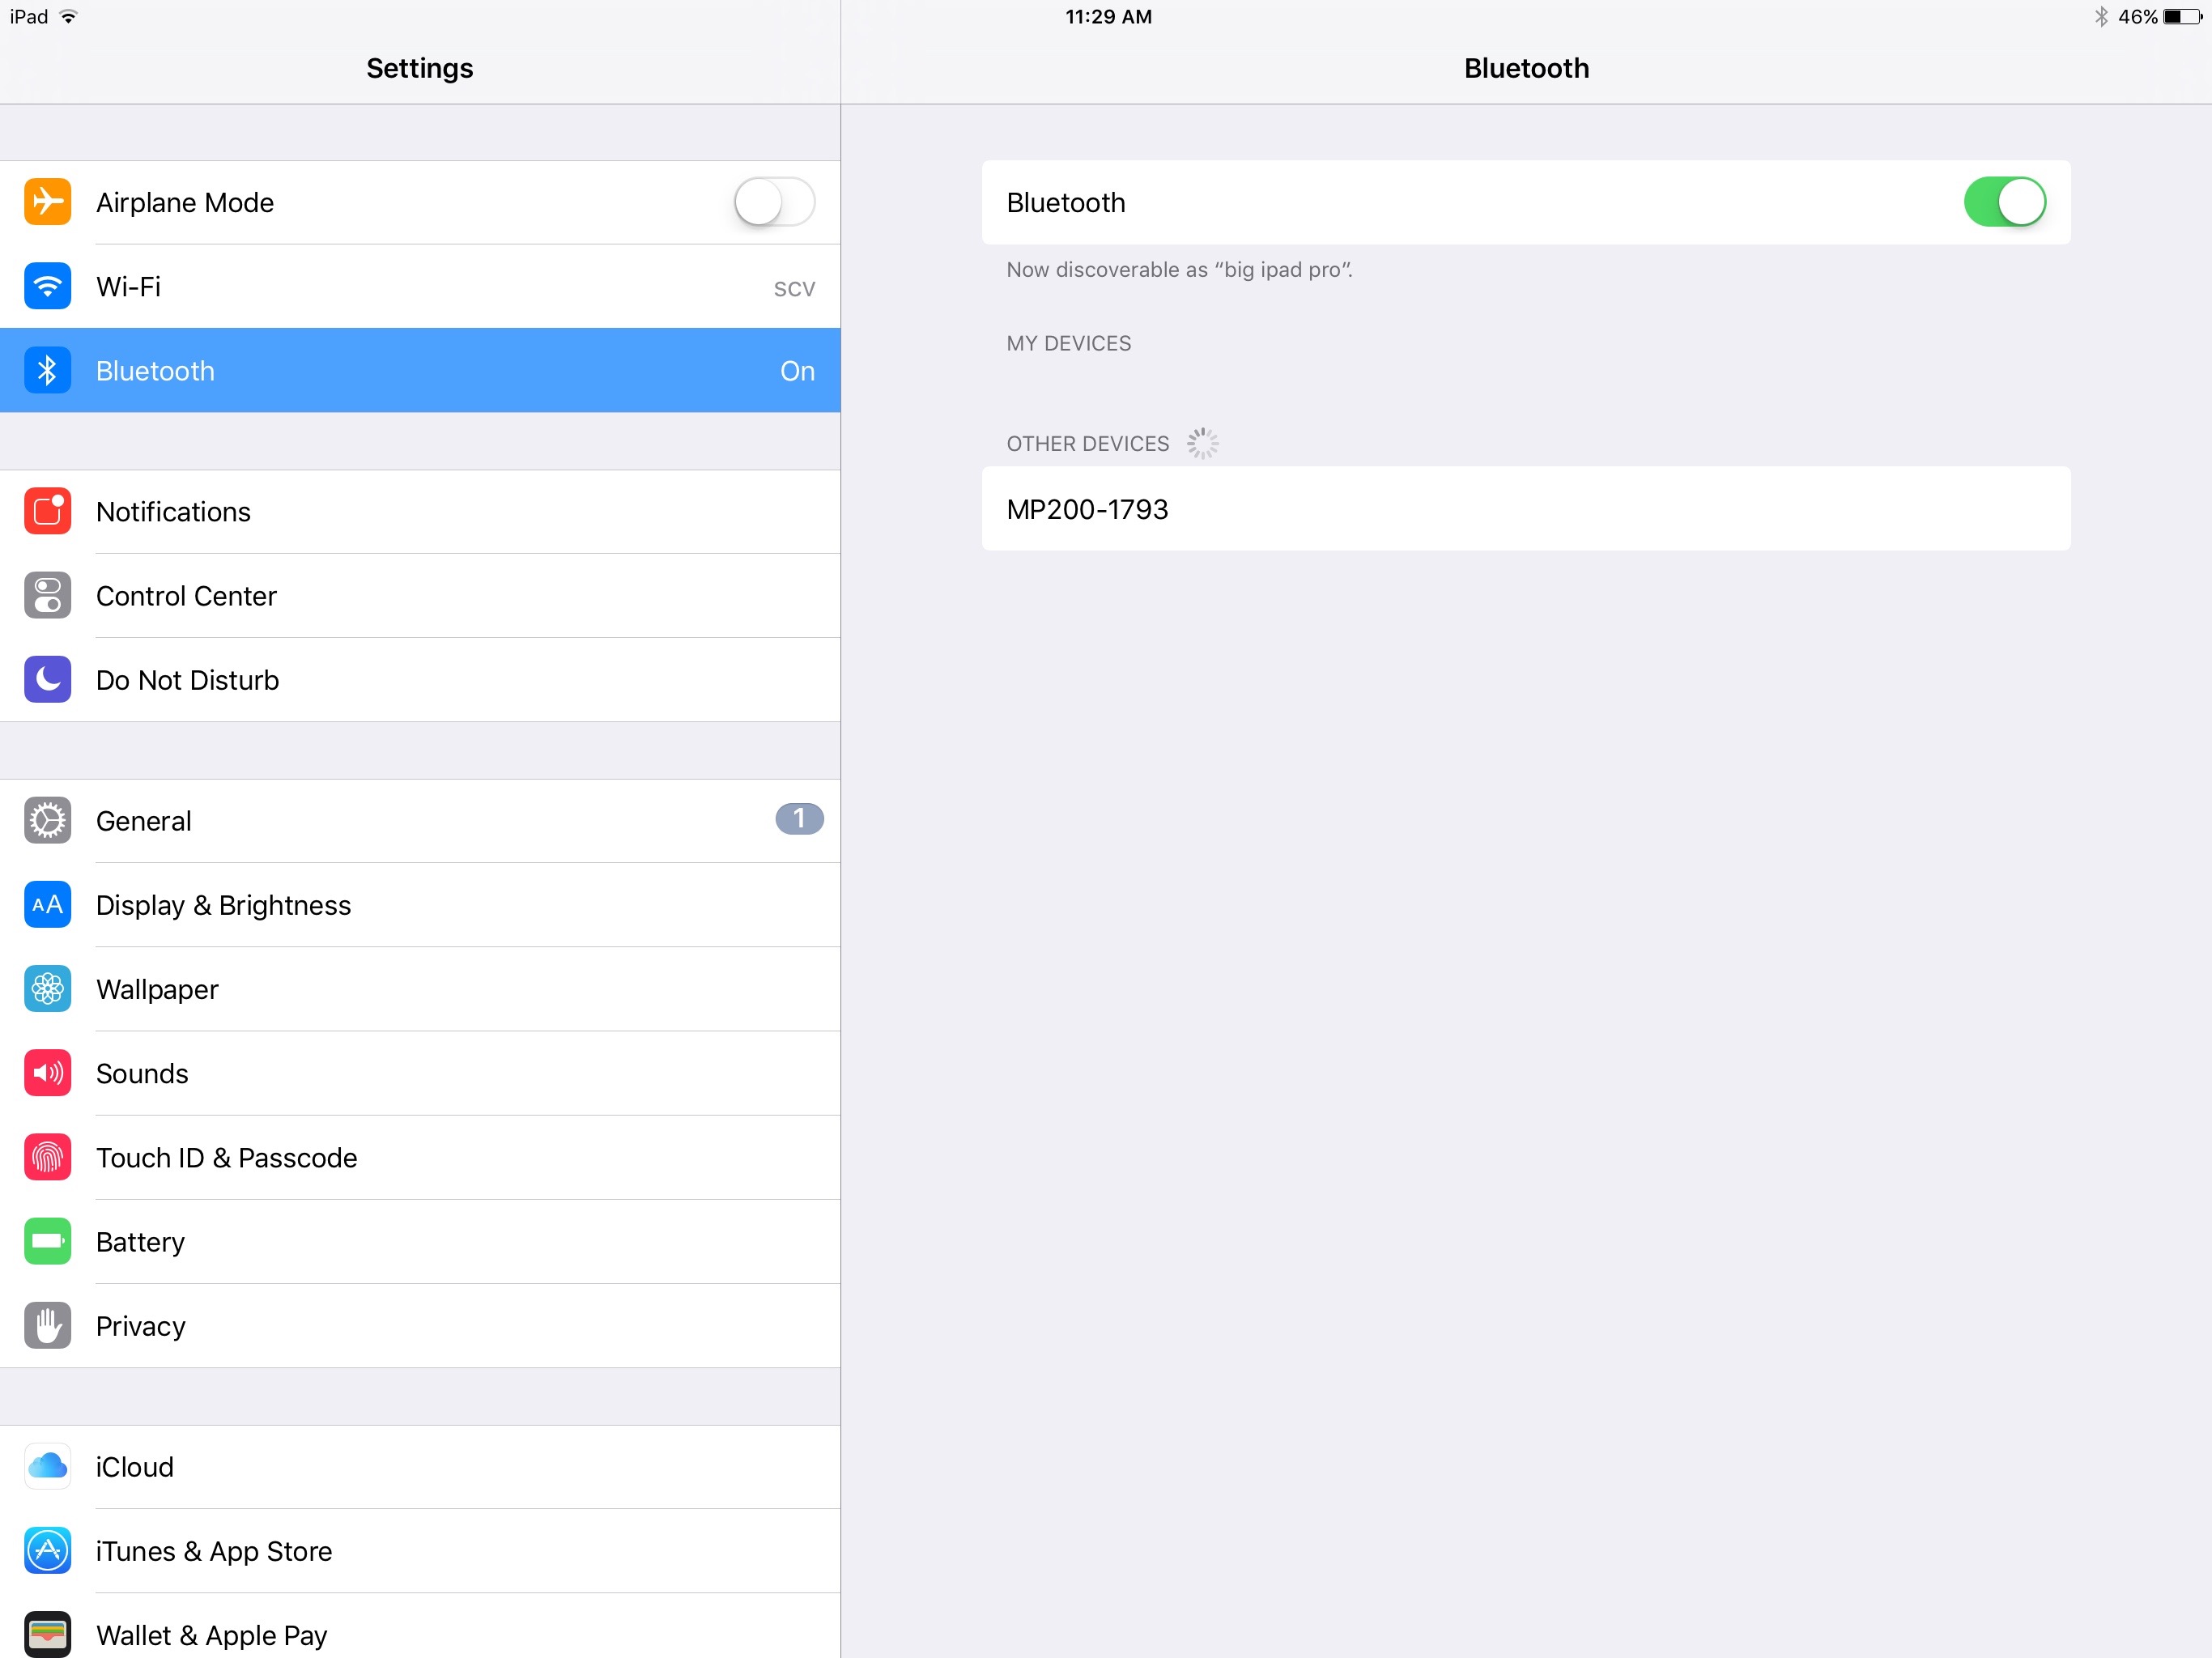
- Go to iPhone/iPad Settings-->Bluetooth-->Enable Bluetooth-->Select the MP200 device
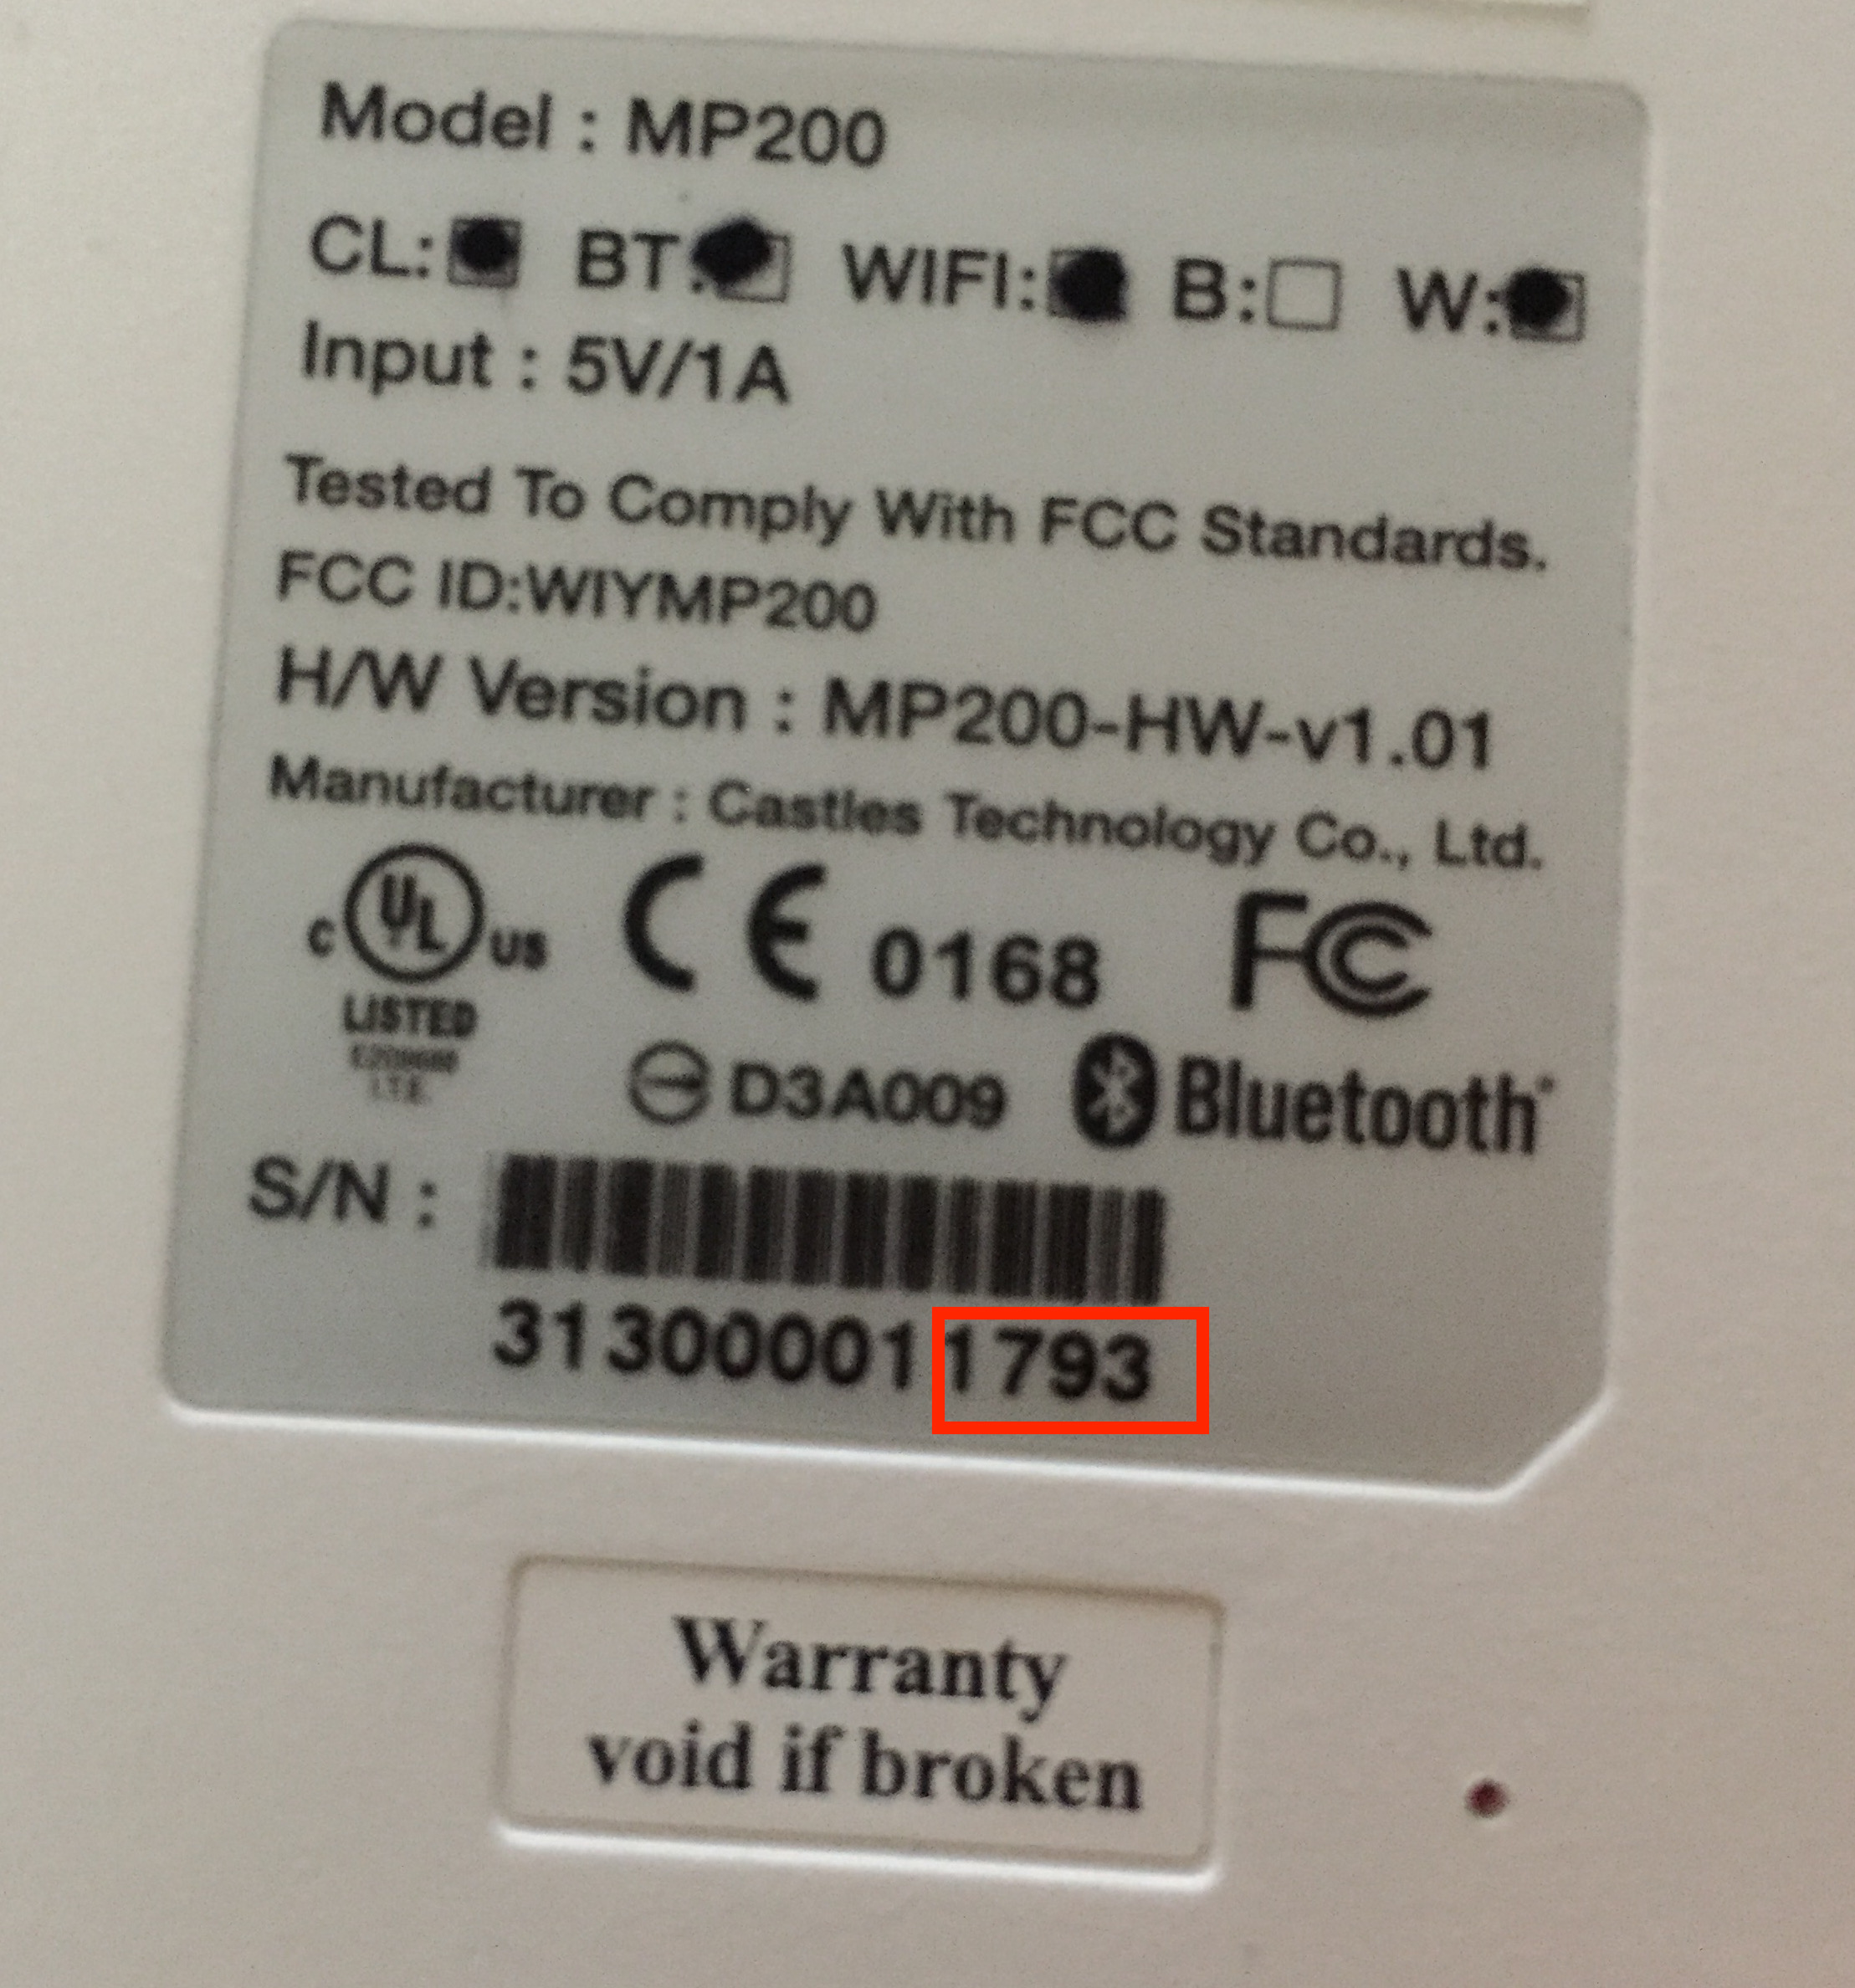
- If you have multiple MP200 devices, find the last 4 digits of the S/N (serial number) on the back of the MP200. See below.
- In our case, we would select MP200-1793 from the iPhone/iPad.
- Once the device connects to the MP200, a PIN will pop up on the mobile device screen. See below.
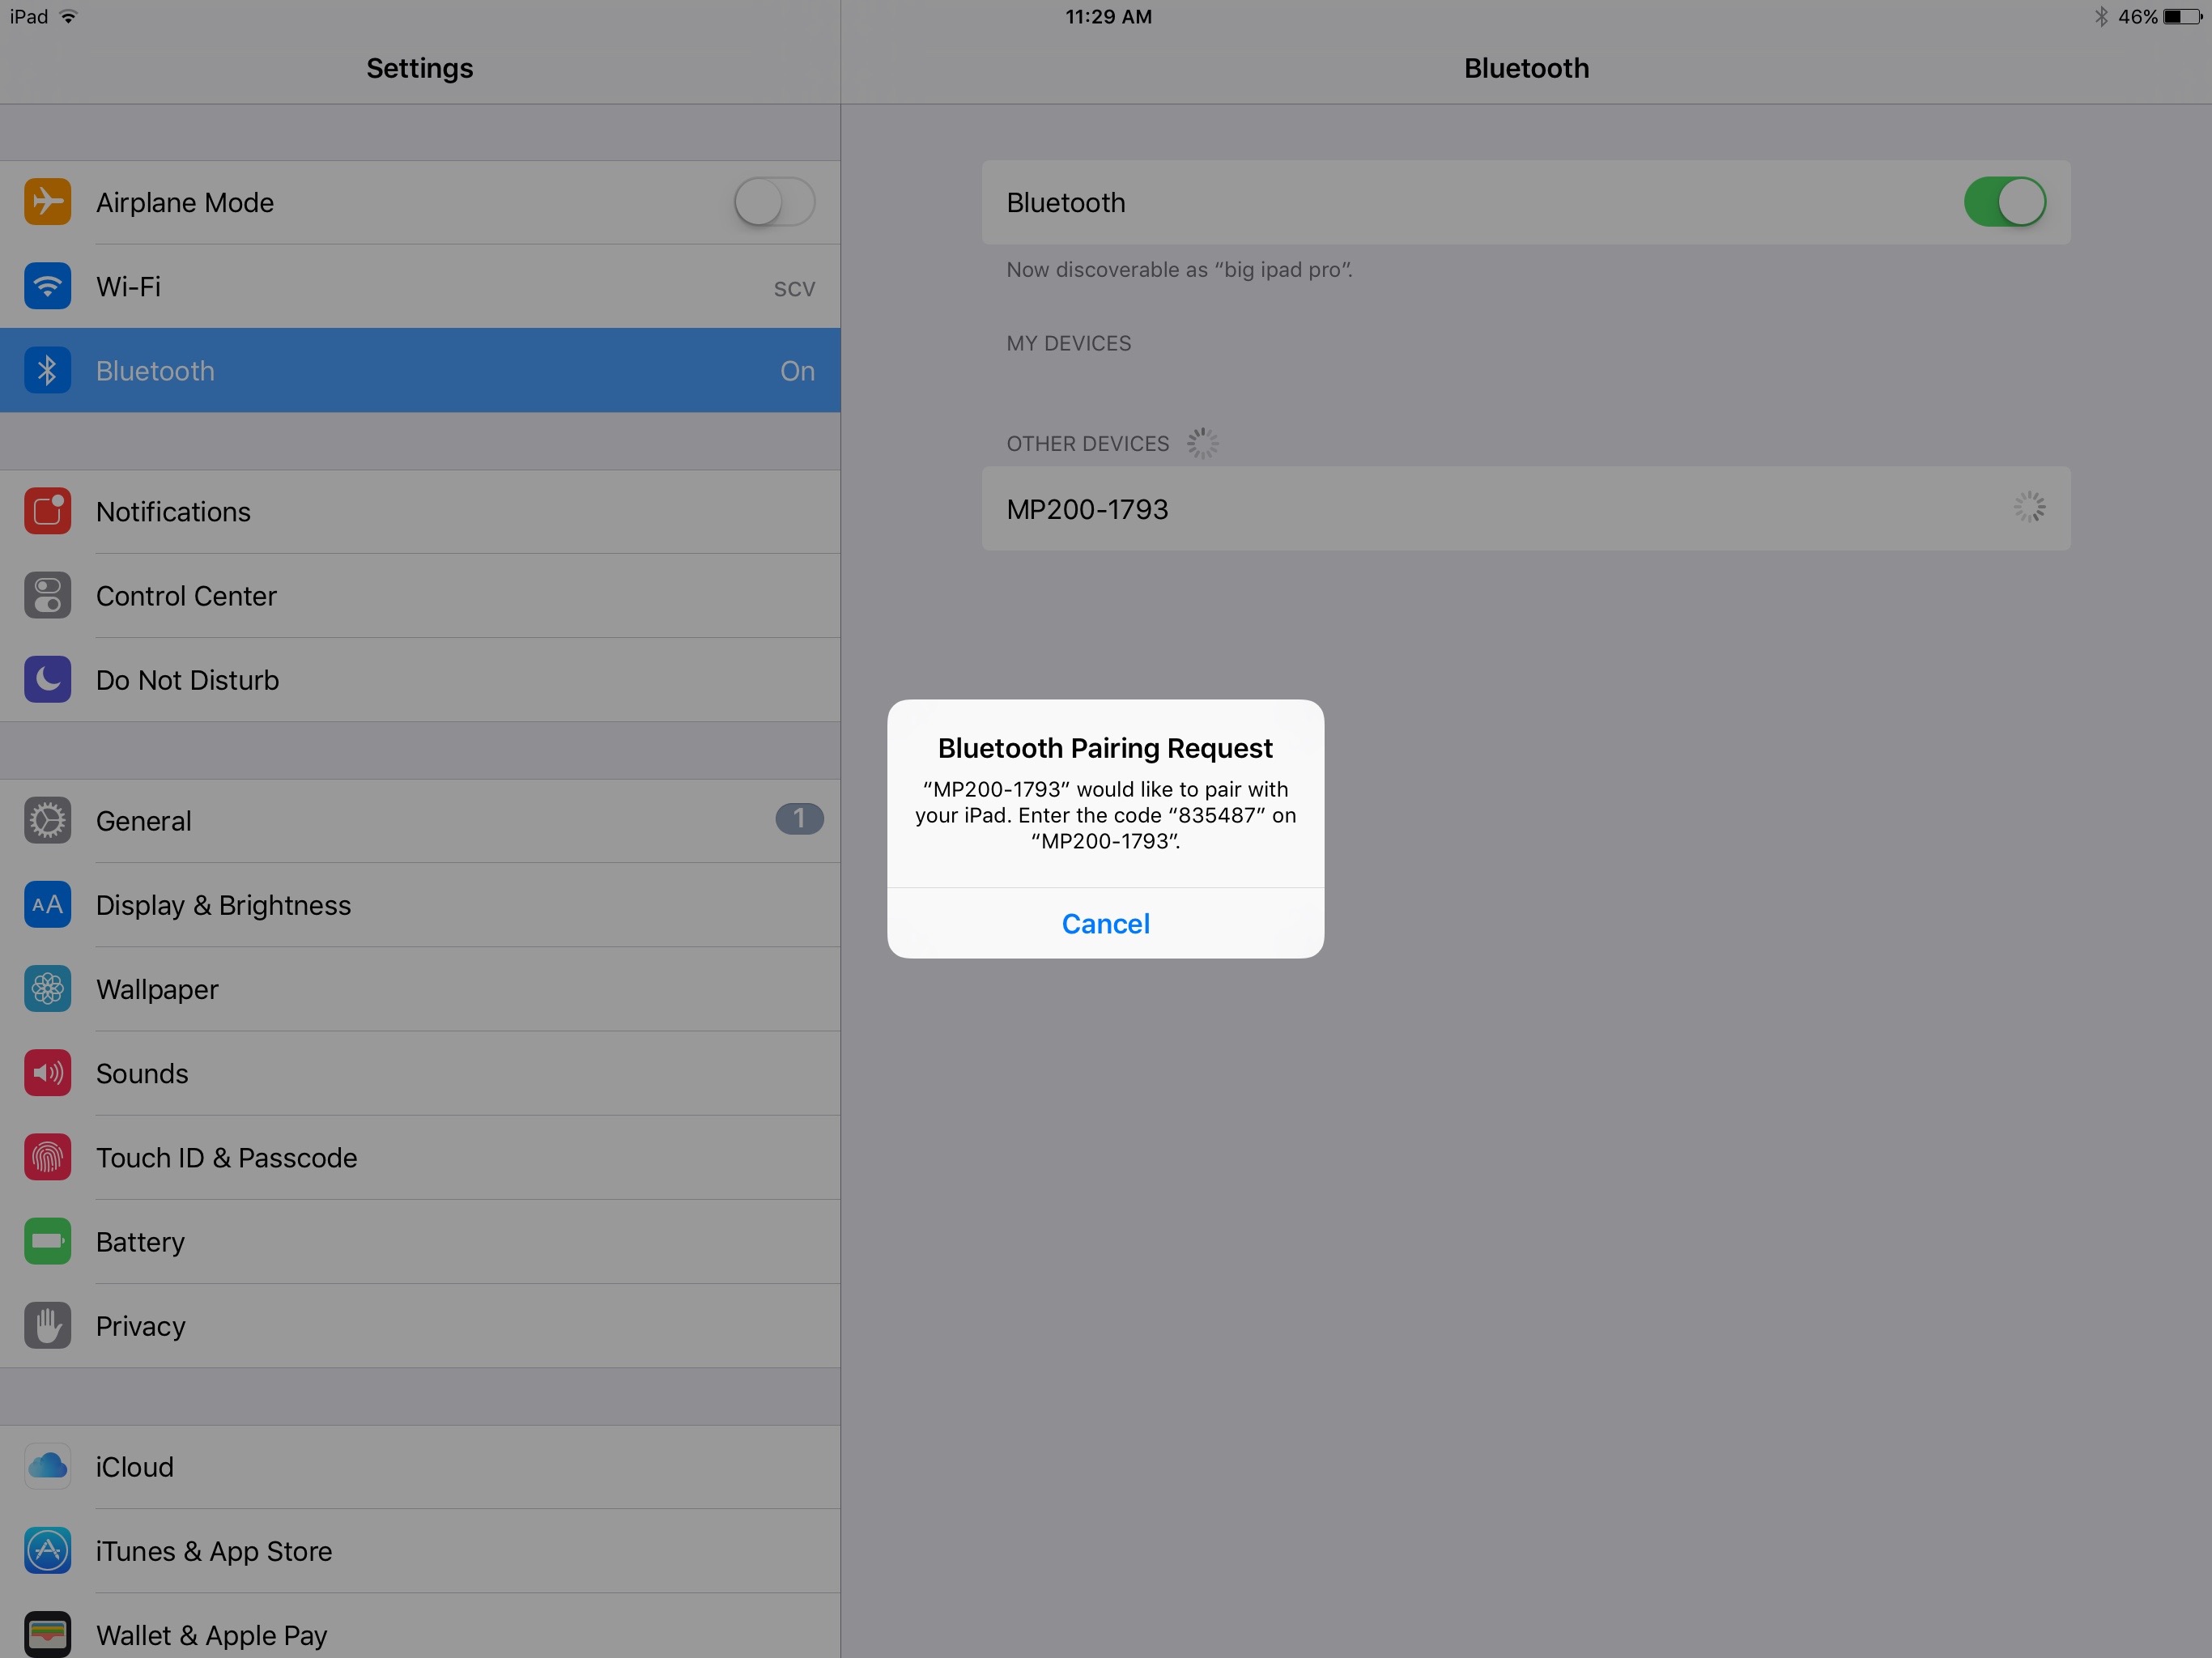
- Enter the pin into the MP200.
- Wait until the MP200 displays a green check mark and "OK." On your phone/tablet you should see the MP200 is "Connected," as shown below.

Pairing to Android
Pair your device (phone) with Castles MP200 via Bluetooth
- Go to your device's Settings
- In Settings, go to Bluetooth
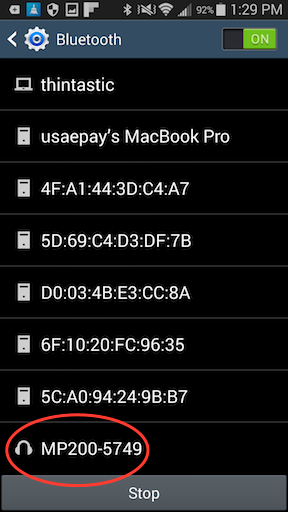
- In Bluetooth look for your MP200 in the list of nearby devices (the name should start with "MP200" followed by a four digit number), click on the device
- A dialog should appear asking you to enter a six digit pin
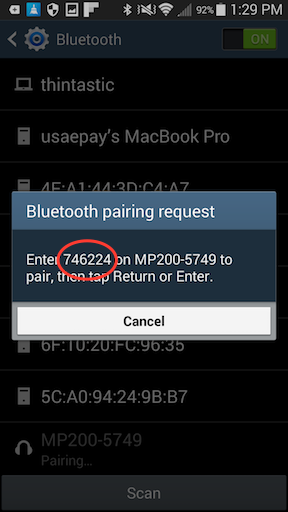
- On your Castles device, press and hold the Bluetooth button until a message on its screen instructs you to "Enter Bluetooth pairing PIN"
- Enter the six digit PIN on your Castles device and click on the green button in bottom right corner of the device's face
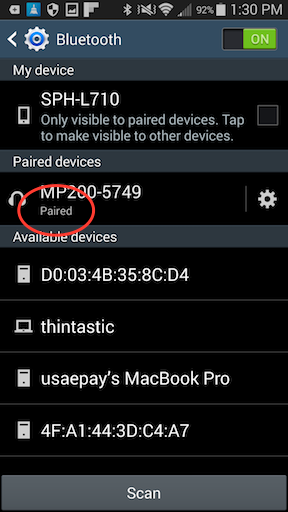
- If you've successfully paired, the Castles device's name will appear the sub-category "Paired Devices"
- Once the device is paired you're ready to connect to it via the USAePay app
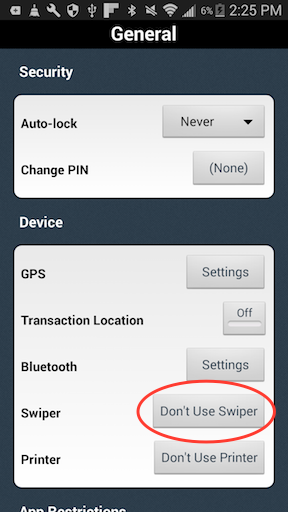
Choosing your Castles device as your Swiper for transactions
- Go to your app's Settings
- In Settings, go to General
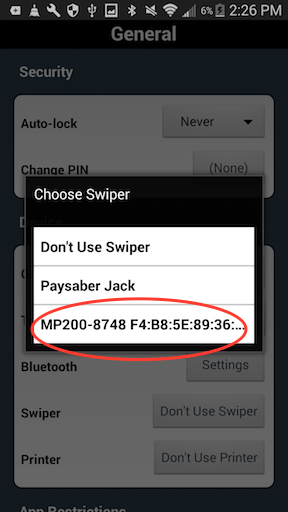
- In General under "Device", click on button that corresponds to Swiper
- A dialog will appear, choose the Castles device you paired with in the previous step (you should be able to identify it by its unique 4 digit code from the previous step that follows "MP200")
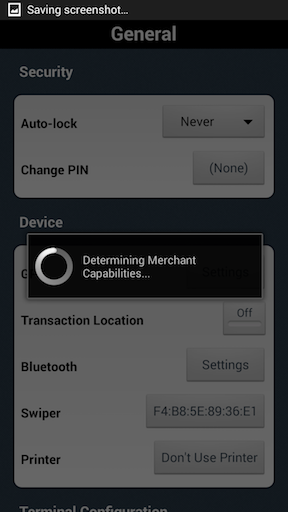
- You'll see a dialog appear that reads "Determining Merchant Capabilities..." By using the Castles MP200 device for transactions you will be able to set your Terminal Configuration depending on what capabilities you have as a Merchant with USAePay.
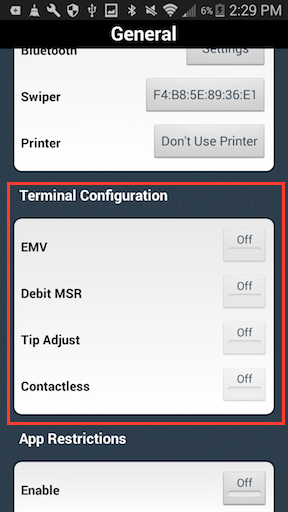
Setting your Terminal Configuration
By completing the previous step, you now have the option of setting your Terminal Configuration depending on your merchant capabilities.
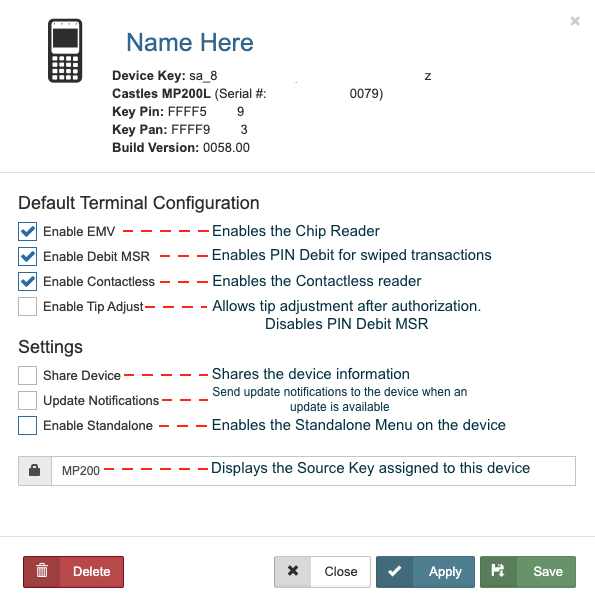
A "Terminal Configuration" section should have appeared on the page. Here you will find four options: EMV, Debit MSR, Tip Adjust, and Contactless. If, as a Merchant, you don't have one of these capabilities, the toggle button for that capability will be greyed out and you won't be able to set it. All capabilities you do have, as a Merchant, will enabled for you to set. Simply toggle the option on and that will enable the feature when running transactions.
Pairing Device (Payment Engine)
- On the MP200 device press and hold the Wi-Fi button until you hear the second beep sound.
- You will then be shown a list of available Wi-Fi networks that are in range of the MP200.
- Scroll to the network that you want to connect to and press the green key again.
- The device will then prompt you for the password for that network. Use the keys to enter letters and numbers by pressing the key repeatedly to scroll through the available characters for that key.
- When completed, give the device around thirty seconds to connect with the Wi-Fi network. The Wi-Fi indicator will change from a Wi-Fi symbol with an exclamation mark to showing the Wi-Fi signal strength.
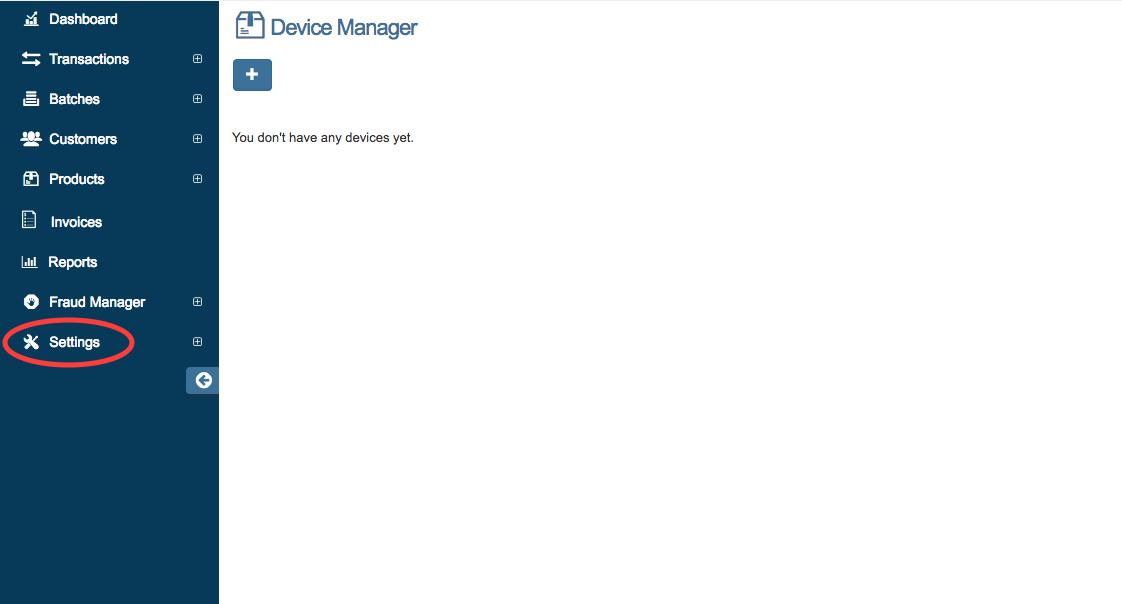
1.) To access the Device Manager, click on ‘Settings’ from your side menu bar then select ‘Device Manager’ on the drop down menu.
2.) A source key must be added first to connect your device (CASTLES MP200). Go to ‘Settings’ from your side menu bar and then select ‘API Keys’ on the drop down menu. Click on 'Add API Key' to add a new source key.
3.) After a source key has been generated, return to the Device Manager section under Settings. Click on the 'Add' button to add a new Device. The following screen will appear to register device:
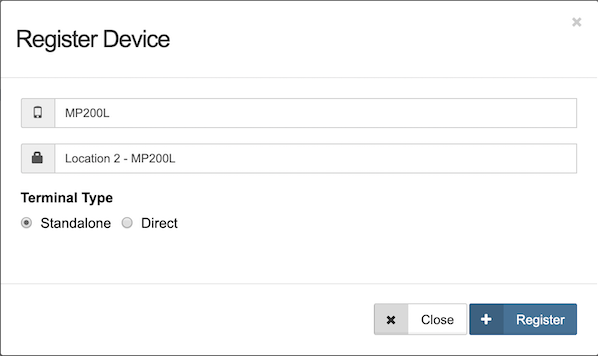
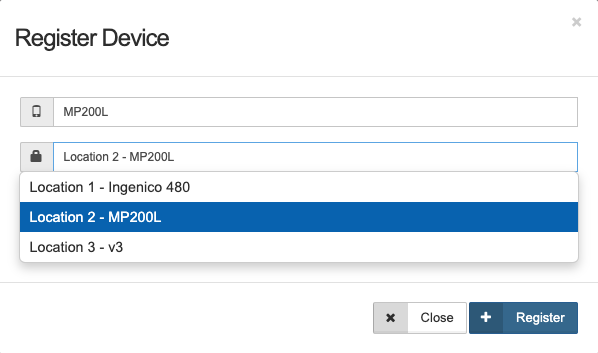
4.) Enter the Device’s Name, select the Source Key from the drop down menu as shown below, and select the Terminal Type as Standalone:
Once the Device Name, Source Key, and Terminal Type have been selected, click on 'Register'. The Merchant Console will then generate a pairing code to pair your device to the Merchant Console.

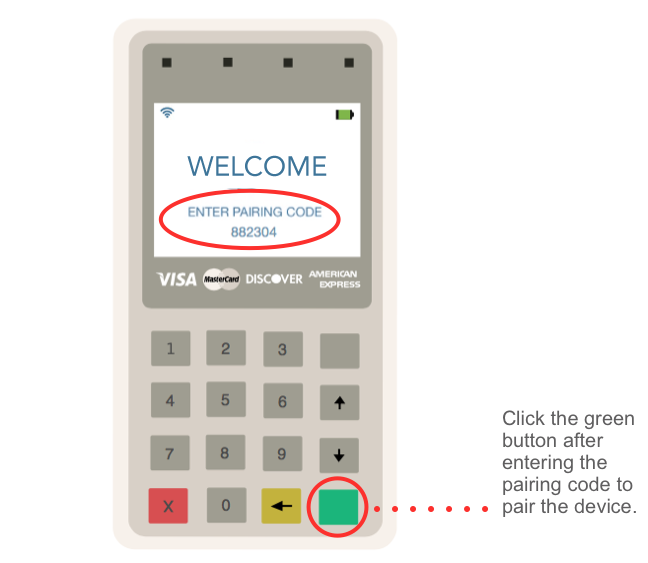
The CASTLES MP200 device will then ask you to enter the pairing code (shown in the Merchant Console):
5.) Once the pairing code has been entered, your device should be connected. The green icon in the top right of the box indicates that the device is connected.

6.) Device Options: Click on the device to view the device’s settings. The following page with the device’s information and options will appear:
7.) Now that a device is connected to your Merchant Console, the Simple Charge option will appear under the ‘Transactions’ section of the Console.
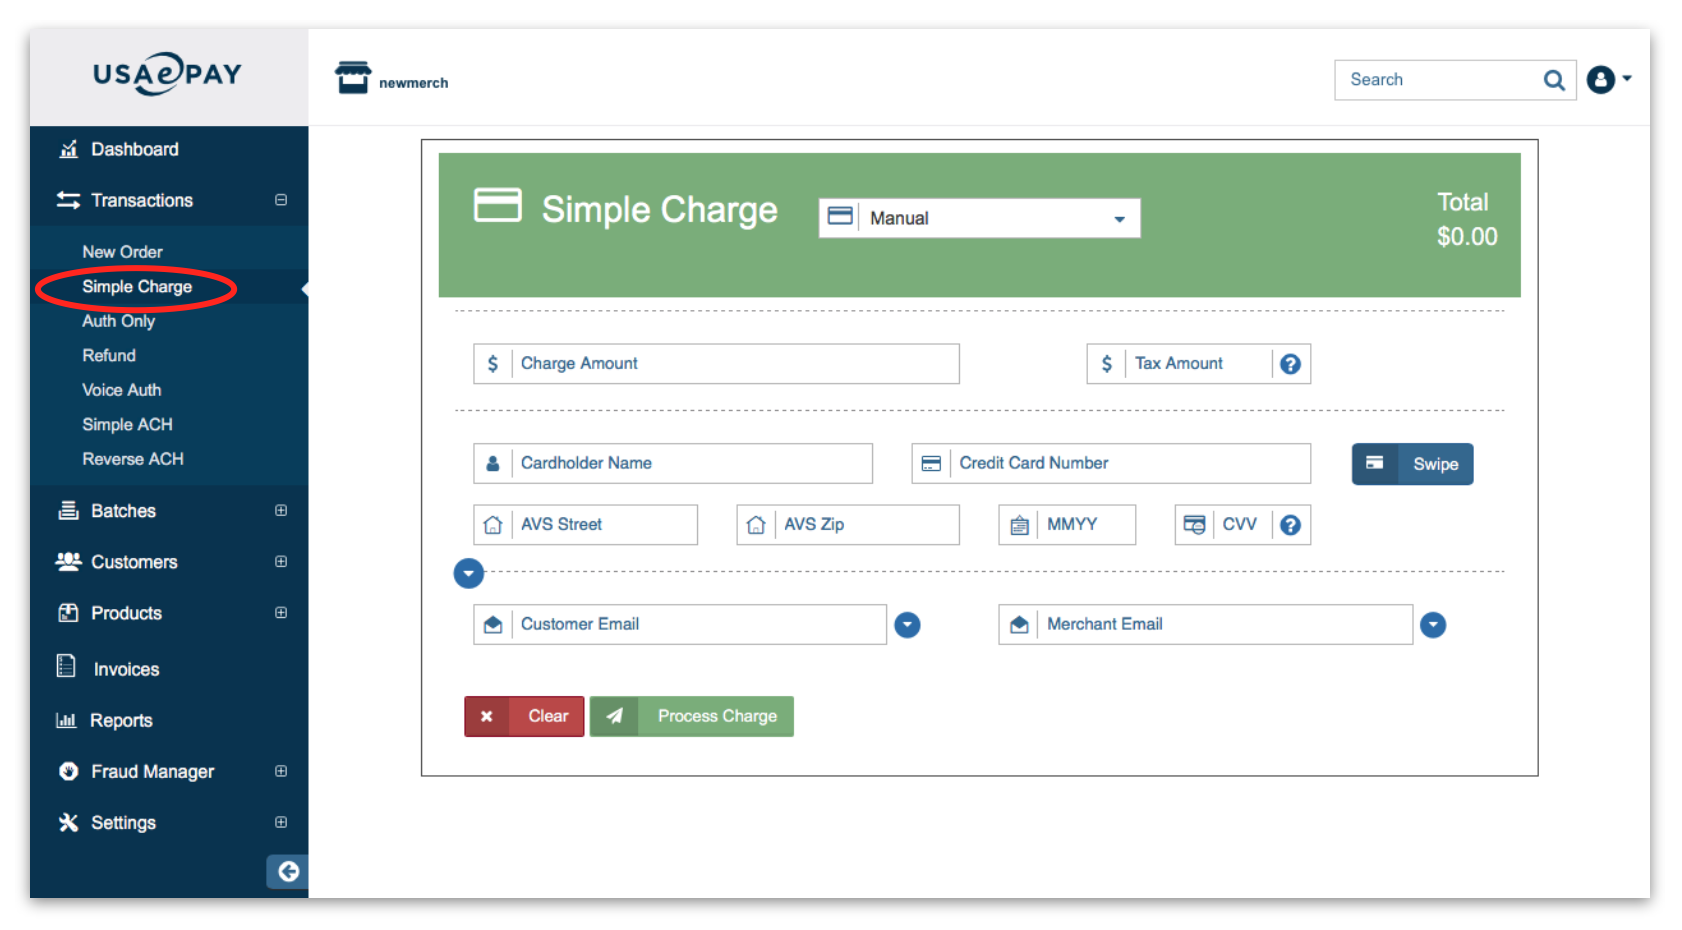
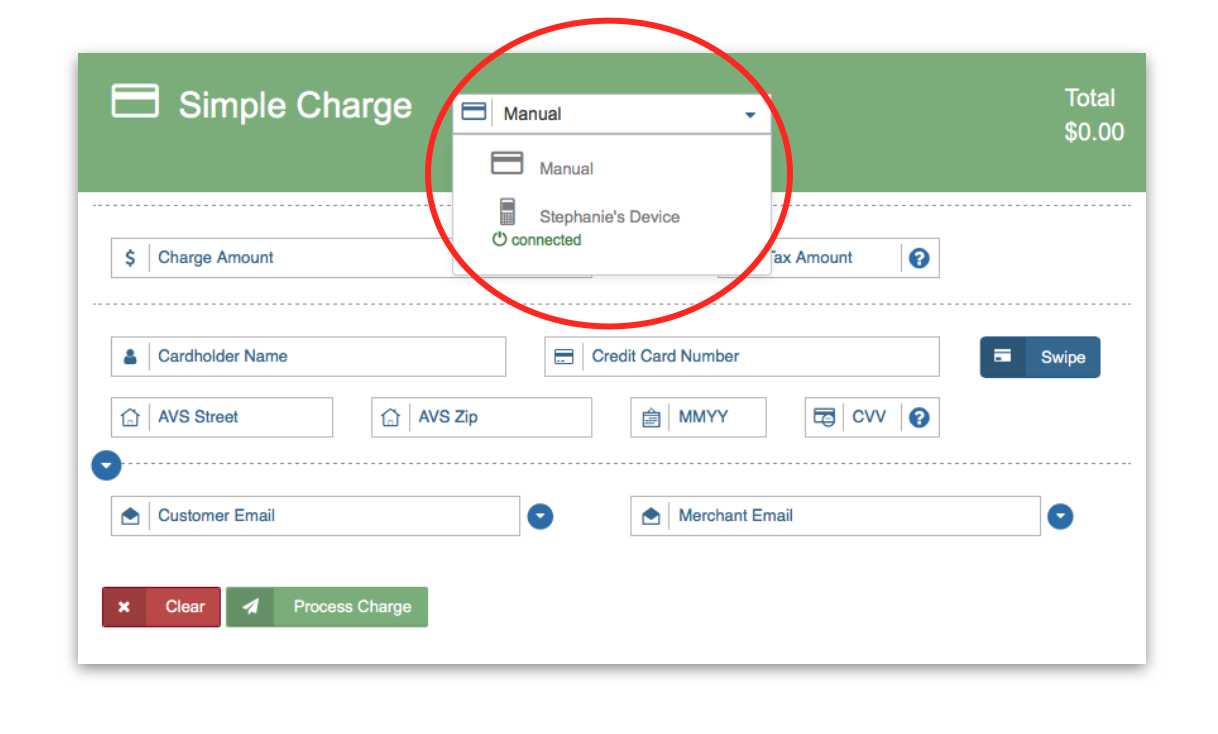
When you click on Simple Charge in the side menu, you can either enter the information manually or use your device to process the card. Click on "Manual" to reveal the drop down menu and select from the devices connected.
After all information has been entered, click on 'Process Charge' to process the transaction.
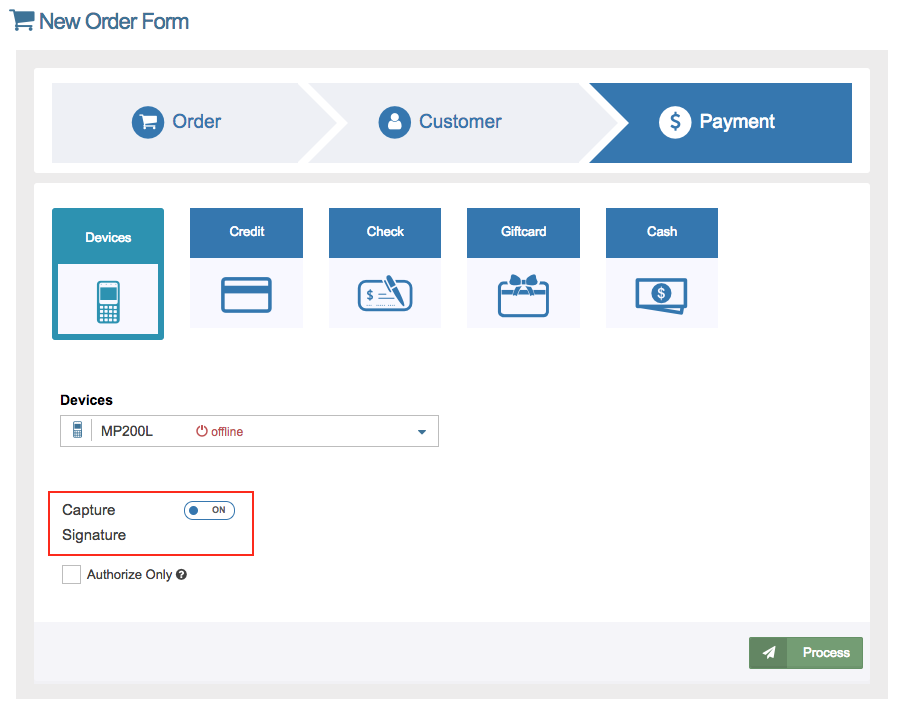
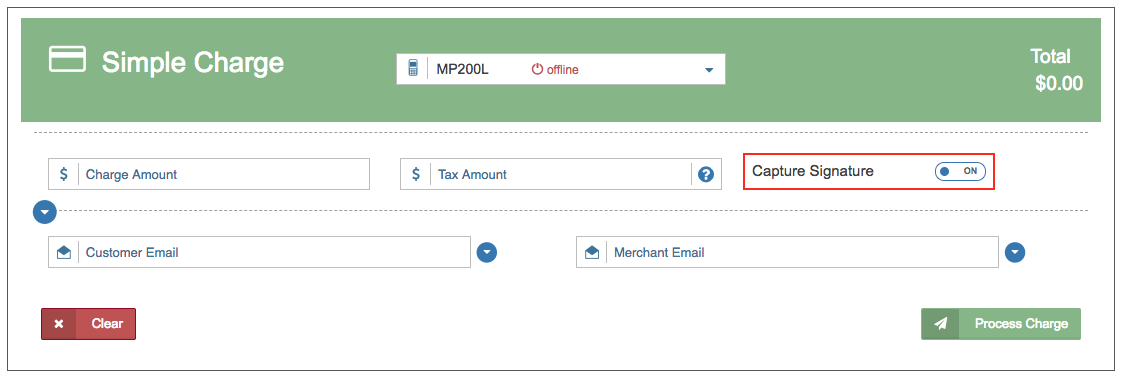
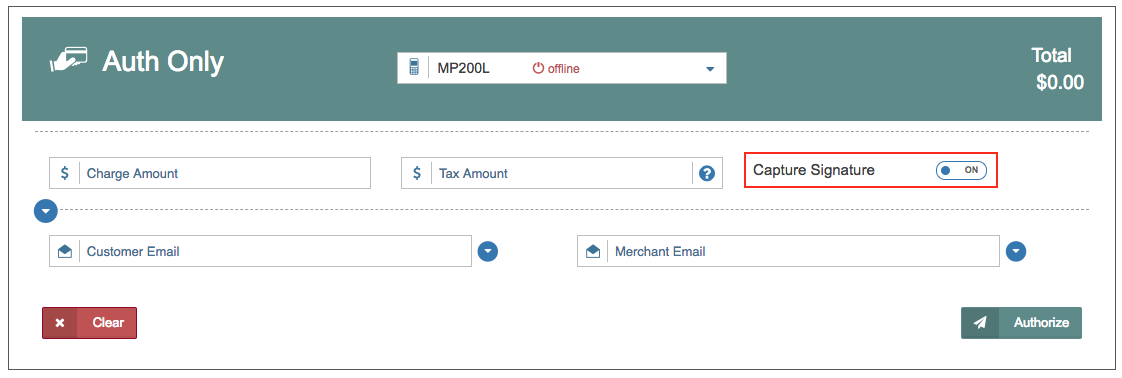
Signature Capture
Signature capture is only possible on the MP200L model with the upgraded touchscreen. This option will appear on New Order, Simple Charge, and Auth Only screens in the console.
New Order:
Simple Charge:
Auth Only:
Signature Screen
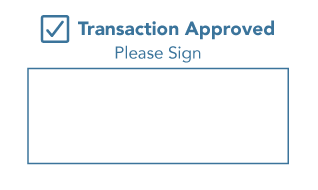
This is what the signature screen will look like on the MP200L. After the customer is finished signing, press the green OK button to confirm the transaction.
The signature will then appear in the Transaction Details.