
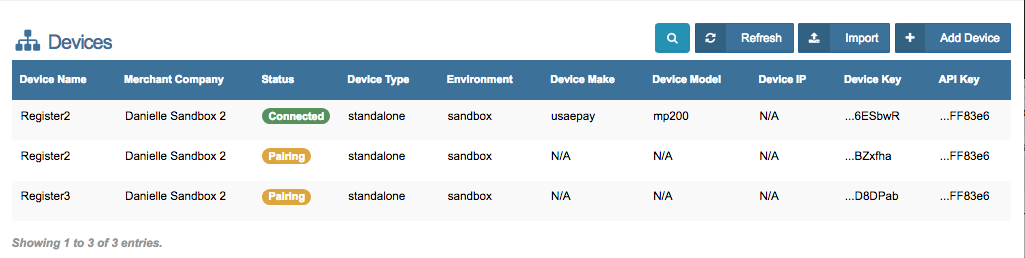
Devices
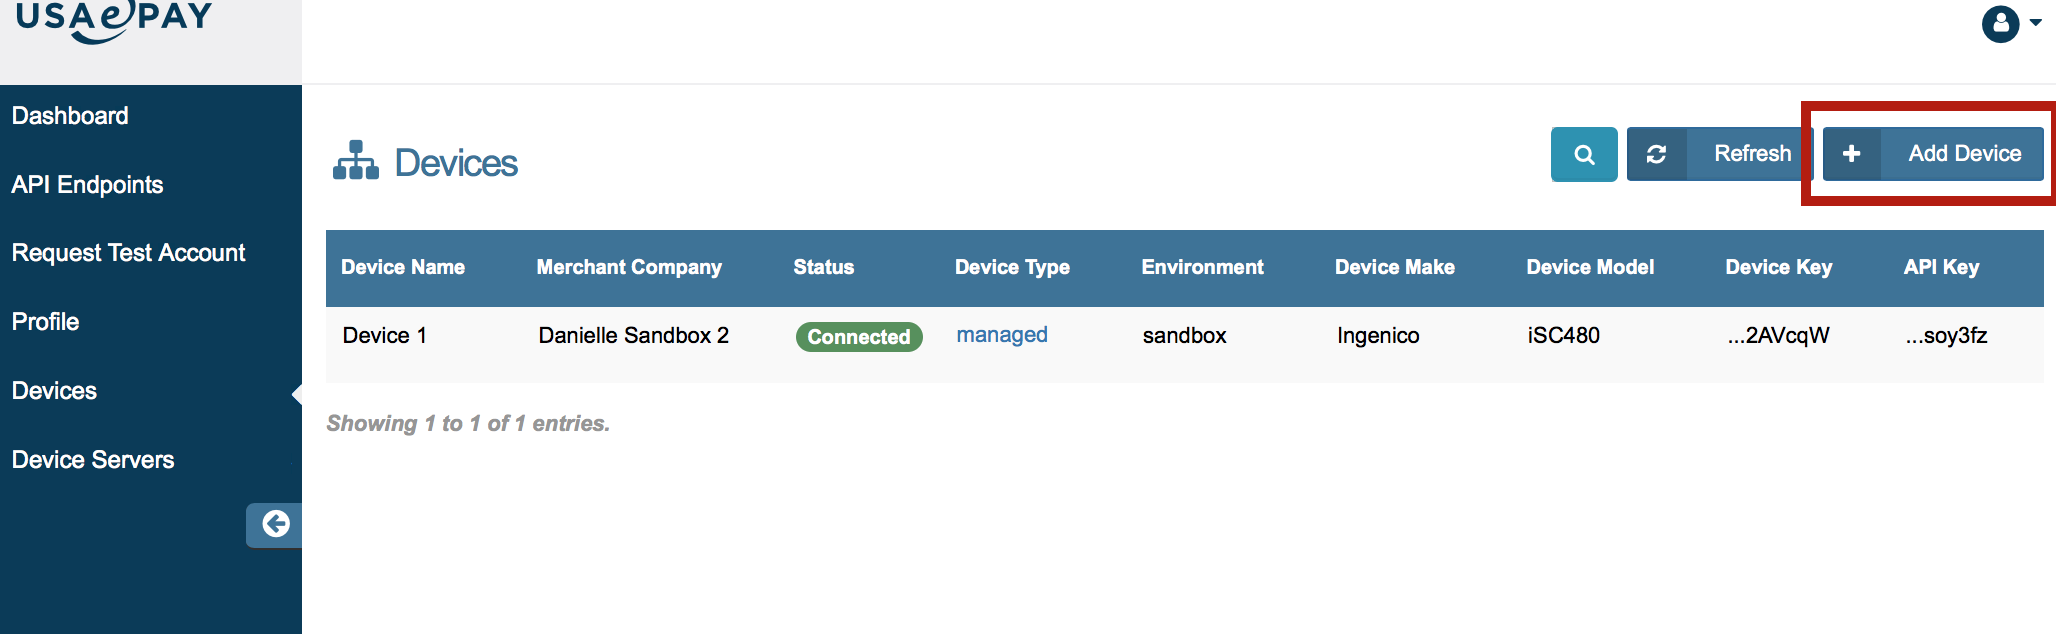
The Devices page of the Developer Portal page will show the list of devices you are currently managing. This list can contain devices over multiple merchant accounts. You can add devices that have already been registered or register the devices as you add them.

Device Icons
MP200/L: ![]()
Vega3000: ![]()
Ingenico: ![]()
New Device vs. Registered Device
A new device is a device that has NOT been paired or registered in the Merchant Console Device Manager. If you are pairing a new device then it can be registered as a stand alone or a managed device. If you are going to connecting the device to the Virtual Appliance then the device will ALWAYS be a new device.
A registered device is one that has been paired or registered in the Merchant Console Device Manager.
Stand Alone vs. Managed Device
A stand alone device is one which you do not need a virtual appliance to manage. Castles MP200's will be stand alone device, and all registered devices will automatically be categorized as stand alone.
A managed device is one which you use one of the appliances to manage, like the Ingenico ISC480. Visit the Connection Manager for Windows and the Connection Manager Virtual Appliance pages for more information.
Adding a Device
Creating an API Key
If it is your first time adding devices to the Connection Manager Pro, you will need to make sure you have an API Key created to attach each device to. You can add more than one device to each API Key. If you are managing devices from multiple merchant accounts, then you will need to create an API Key for each merchant account, because the API Key is what links that device to that specific account.
Login to the merchant account and create an API Key/Source Key and PIN for your devices. Instructions for both the Legacy Console and Console 2 are listed below.
Legacy Console
- Go to the Settings tab, then the Source Keys sub tab, and click "Add Source".

- Enter required fields and click "Save". Required fields are listed below:
- Name- Name the source key for the payment device.
- PIN- Create a pin for this source key. This is NOT optional when creating for a payment device.
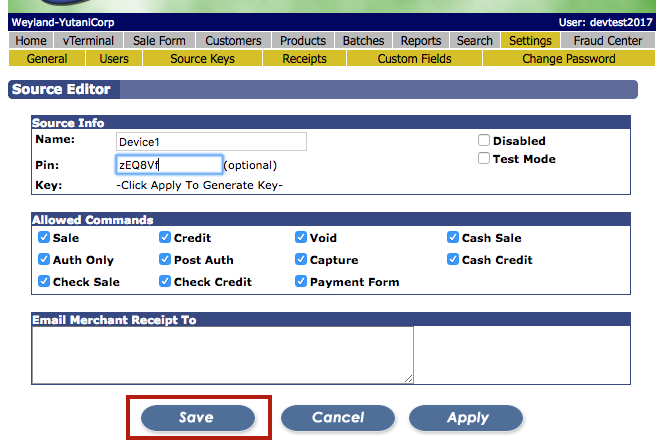
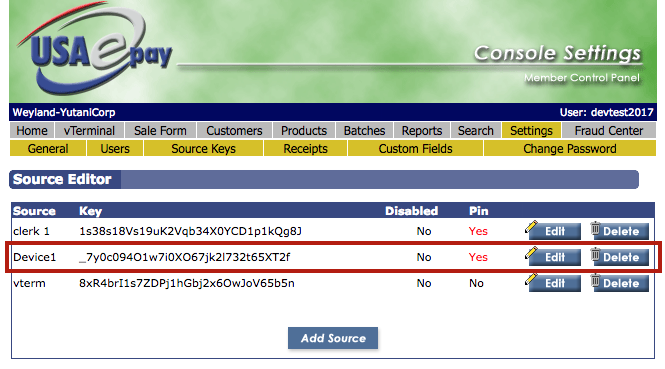
- The system will generate a source key and return to the main Source Keys page.
Console 2
- Go to the Settings tab, then the API Keys sub tab, and click "Add API Key".
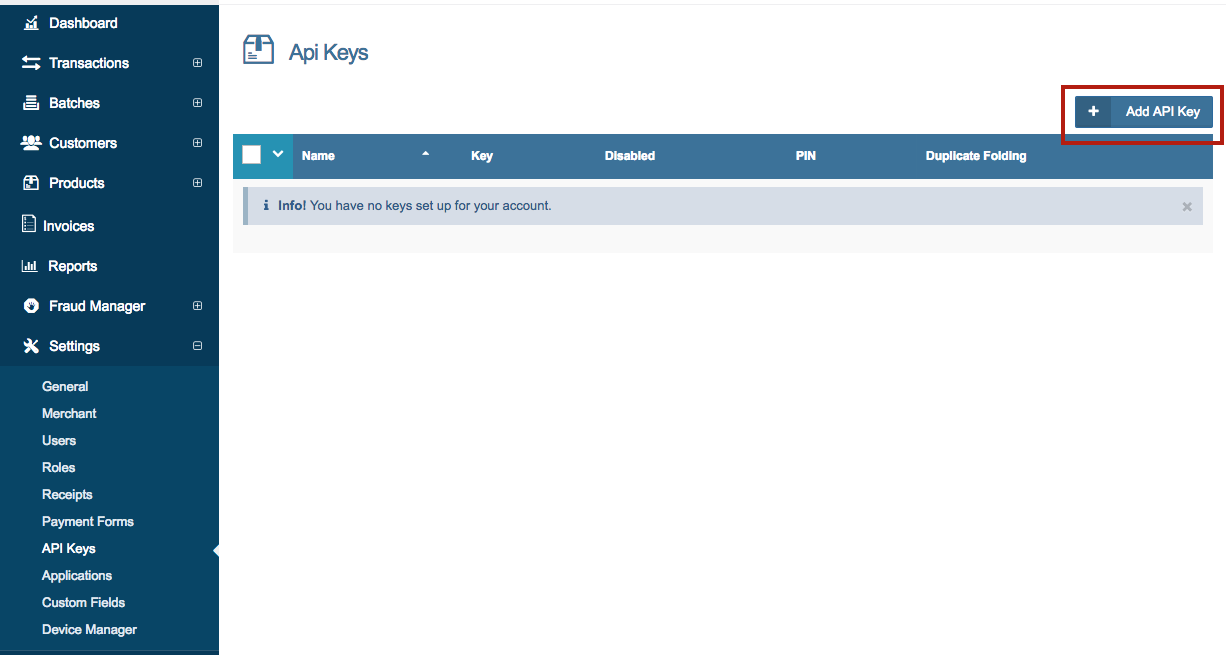
- Enter required fields and click "Save". Required fields are listed below:
- Name- Name the API Key for the payment device.
- PIN- Create a pin for this API Key.
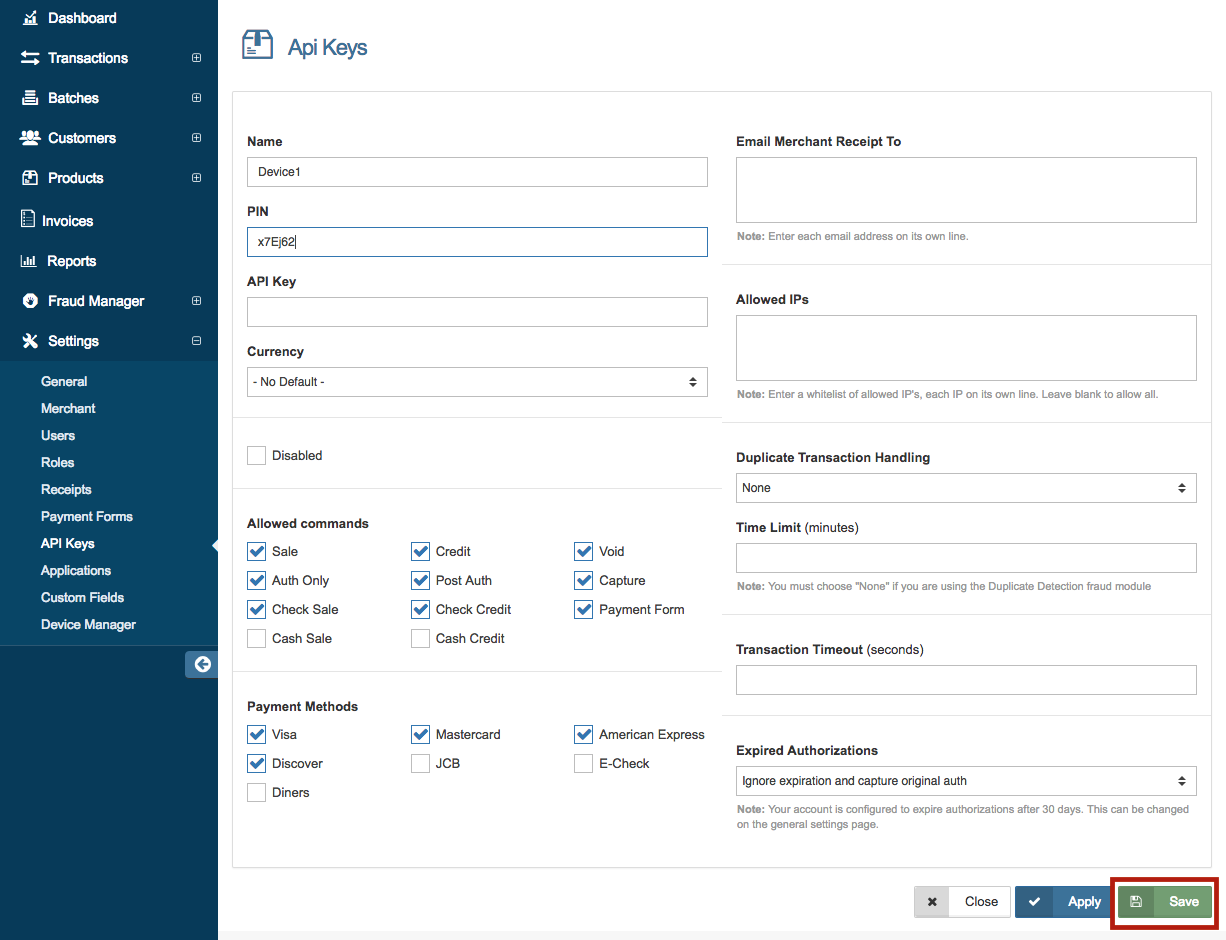
- The system will generate an API Key and return to the main API Keys page.

Add Device Info
Step 1
Click "+ Add Device" at the top of the page on the Devices tab.
Step 2
Enter ALL of the fields. Different kinds of devices will require different fields. If a field is not displayed then it is not required.
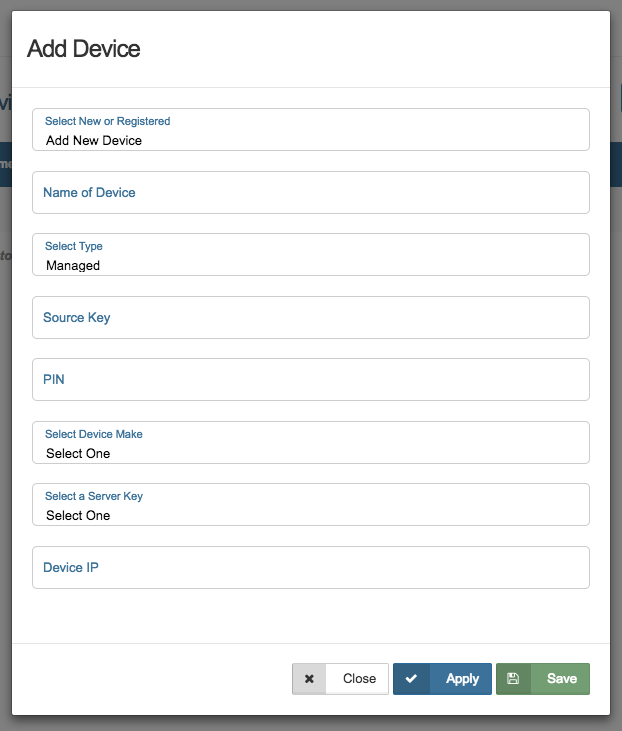
Descriptions of each field are below:
- Select New or Registered- See above for more information.
- Name of Device- Name the Device. Device name can contain letters, numbers, spaces, and dashes. All other characters will be filtered out.
- Type- Choose Managed for devices being managed by an appliance, Direct for devices using Payment Engine Direct, and Stand Alone for all others. See above for more information.
- Source Key- Enter the API Key you created above.
- PIN- Enter the PIN associated with the API Key you created.
- Device Key- The unique device key listed in the Device Manager.
- Device Make- Click dropdown menu and select the make of the device you are connecting.
- Server Key- Select the Device Server that you would like to link this device to. If you are using an appliance, you will need to create this server before connecting devices. See the Device Servers section below for more information.
- Device IP- Enter IP address of the device you are connecting.
- Environment- Sandbox or Production. The environment must match the API Key environment.
Step 3
Click "Apply" or "Save" and and the portal will confirm the device was successfully connected.

Step 4
The device will be listed on the "Devices" page and in the Connection Manager Pro (see below). Repeat this process for all devices you wish to manage from the Connection Manager Pro.

Import Devices
The Connection Manager also allows you to add multiple devices to your device servers by uploading information for multiple devices in a CSV document. Below are the steps for uploading both a managed and standalone devices.
Prepare the File
First, you will need to prepare the document with your device information. It must be in .csv format. Below you will find descriptions of the fields the file could include and an example template. Please Note: Documents must include only the devices that have the same type (Stand Alone or Managed) and same make.
| Field | Requirements | Description |
|---|---|---|
| Store | Optional | Store number associated with device. |
| DBA | Optional | Name of merchant associated with device. |
| device_name | Required for ALL | Merchant assigned terminal label. Device name can contain letters, numbers, spaces, and dashes. All other characters will be filtered out. |
| apikey | Required for ALL | API key device should be connected to. |
| apipin | Required for ALL | API pin for the above api key. |
| device_ip | Required for Managed | IP address associated with device. |
| devicekey | Required for Standalone | Unique gateway assigned alphanumeric string. |
Device Import Templates:
Specify File Information
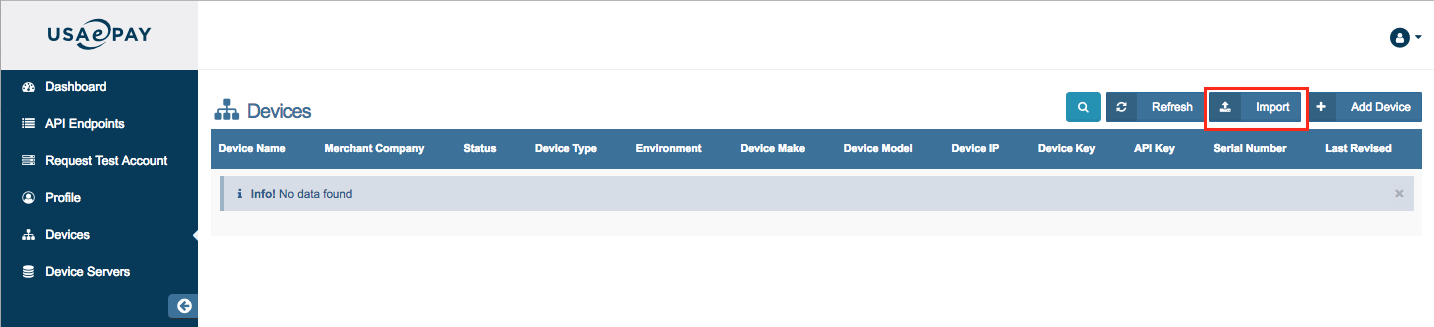
Once you have prepared the document, click the 'Import' button at the top of the 'Devices' page.
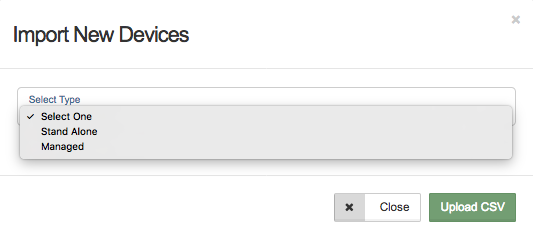
Next, specify if the file contains managed or stand alone devices, and the fields associated with that device type will populate.
Managed Devices
When importing managed devices you will have to specify the following fields:
- Select a Server Key- Select the Device Server that you would like to link this device to. If you are using an appliance, you will need to create this server before connecting devices. See the Device Servers section below for more information.
- Select Make- Select the make of the device you are connecting.
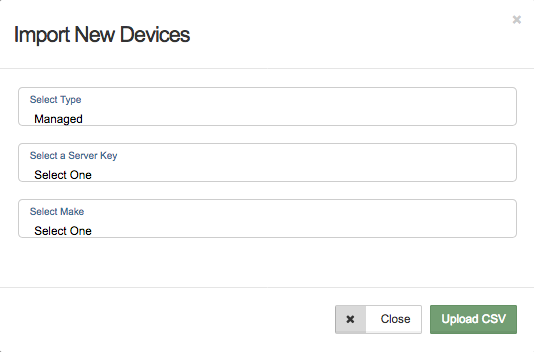
When complete click 'Upload CSV' button.
Stand Alone Devices
When uploading Stand Alone devices, you will only need to specify the Environment (Sandbox or Production). The environment must match the API Key environment.
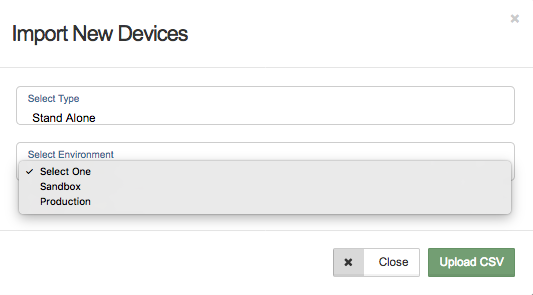
When complete click 'Upload CSV' button.
Upload and View Errors
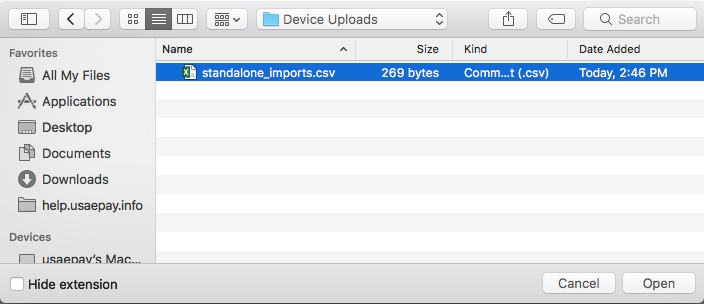
Choose the file you wish to upload and click 'Open' and the developer-portal will parse the data in the file.
Once the data is parsed, the portal will show the following fields:
- Total Attempted- The number of devices you attempted to import.
- Successfully Saved- The number of devices that were successfully added to the device list.
- Errors- The number of devices NOT added to the list due to an error.
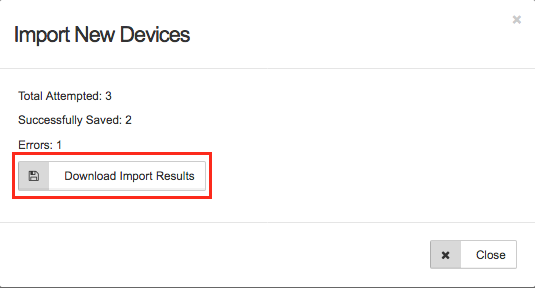
If you will to view the errors in your upload click 'Download Import Results' button. You will see the same .csv file that you uploaded and with two additional columns added:
- Saved- If this column says 'TRUE' then the device was uploaded successfully. If the column says 'FALSE' then the device was not uploaded
- Reason- This will be 'n/a' for successfully uploaded devices. For unsuccessful devices, it will show all relevant errors.
Once uploaded, the devices will be listed in the Devices section of the Developer Portal.
Device Servers
If you are using an appliance, you will need to create this server and link it to the appliance before connecting any devices. Instructions for creating the server are shown below.
Adding Device Servers
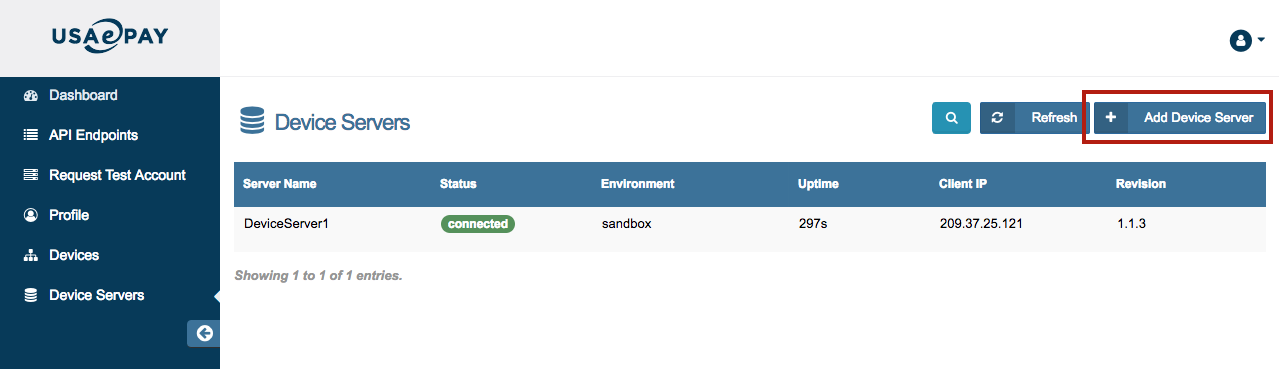
- Go to Developer Portal, select the "Device Servers" tab on the lefthand side, and then click "+ Add Device Server" at the top of the page.
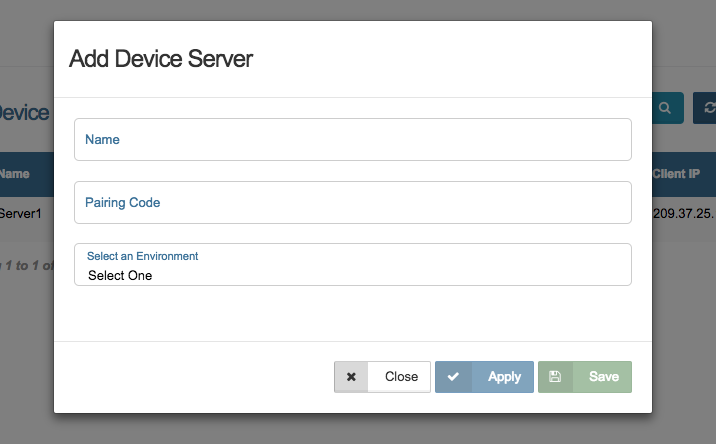
- Enter all fields:
- Name- Name your device server
- Pairing Code- The pairing code provided by the appliance.
- Select an Environment- Choices are, Sandbox or Production. NOTE: You must choose the same environment you selected in the appliance.
- Click "Apply" or "Save". The Device Server will be created.
Bulk Editing
This is an easy way to reset, update and delete all of your connected devices.
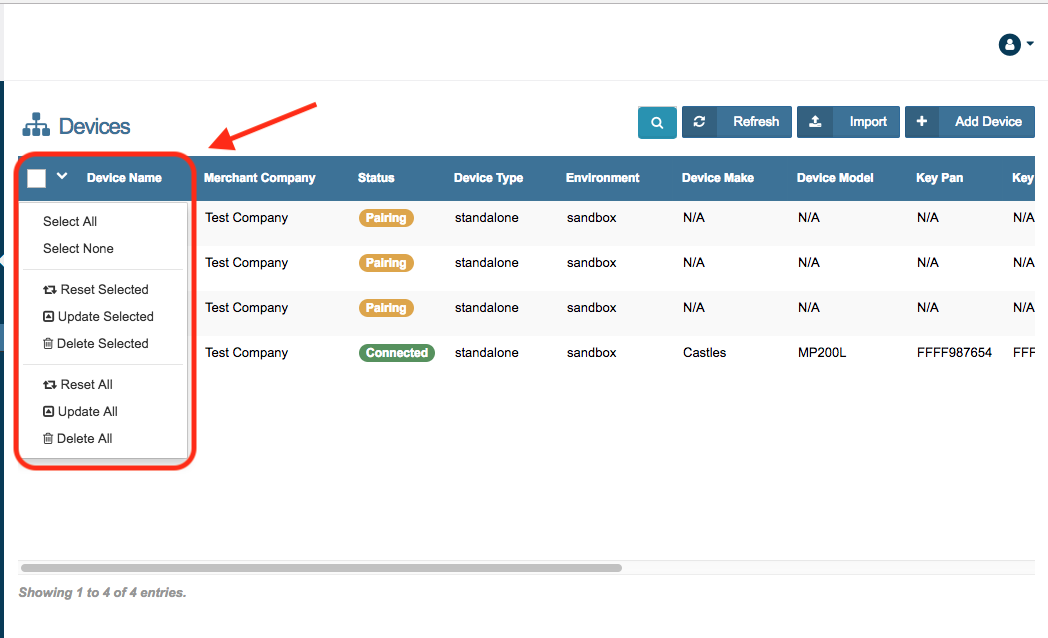
You can check the box of any device you want to edit. Check the top box to automatically select all your devices.
Click the down arrow at the top to reveal the bulk edit menu. Here you can reset, update or delete your selected devices. You can also perform these actions to all devices without checking each box.
Device Labels
Adding labels will help you keep track of your devices. Device Labels are fully customizable and you can add as many as you need. You can create, edit, and delete labels within the Device Edit screen.
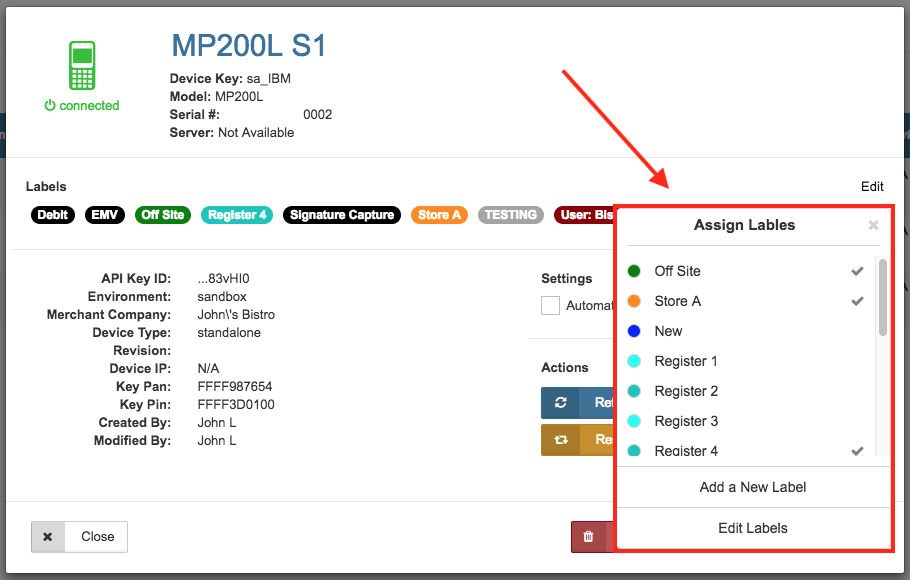
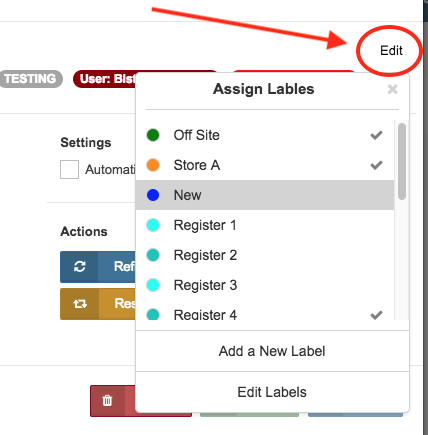
- You can start creating labels by clicking on "Edit" in the Device Edit screen shown above.
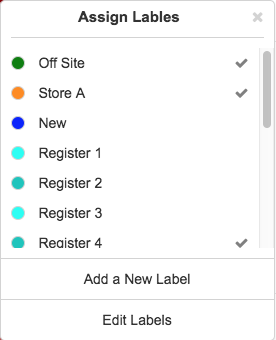
This is the main dropdown menu where you can assign one or more labels. A checkmark to the right of the name shows it is being used for that particular device.
- Add a New Label- Click here to begin creating a new label.
- Edit Labels- Click here to edit an existing label.
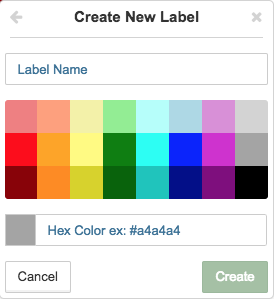
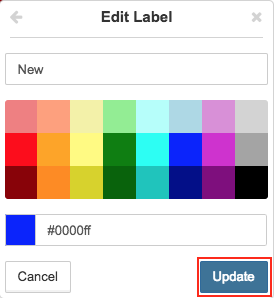
- Label Name- Enter any name for the label here.
- Color Chart- Select any of the available color choices from the chart.
- Hex Color- Enter the Hexidecimal value can be entered here.
- When you are done, click "Create".
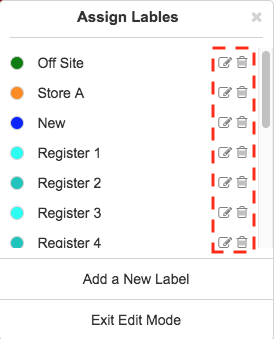
After you click Edit Labels,
- Edit- Will allow you to edit an existing label at the Edit Label screen below. Once you are done, be sure to click "Update".
- Delete- Will delete the corresponding label. You will be asked to confirm the deletion. When you are ready, click "Confirm".

When you are done creating and assigning your labels, be sure to click "Apply" or "Save" on the Device Edit screen to save your changes.